I'm going to expand the scope of my subjects. This is the first.
I grew up working on the family farm and our family campground. As the only boy in the family of seven, most of the repair and maintenance tasks fell on me. In some cases my dad had shown me how to do these jobs, in some cases I learned by watching someone else do a similar task, and in many cases I was left to figure it out on my own. I have to say my father took it for granted that I knew how to do certain things even though I had never done it before nor seen it done. But I was a clever boy and an even more inventive teenager. I can do basic carpentry, plumbing, electrical, and mechanical constructions and repairs. With the advent of the Internet I have greatly expanded my capabilities. As a result, I have fallen into the same attitude my father had; I presume that most men can do these same types of tasks.
It fact, most men can no longer do many of these things or they hire others to do them for convenience. If you have the money you have the luxery of trading cash for convenience and your time. But most of us do not have an excess amount of cash laying around.
Starting with this Post I am going to walk you through maintenance and repair jobs I do, which will save you considerable money if you do them yourself. But if you live near me in Northeast Pennsylvania, you can hire me to do them for you!
Replacing a Broken Handle:
This will be specifically about replacing a broken handle on a sledgehammer but any wood handle can be replaced the same way.
 |
| New handle, broken handle, cause of broken handle |
How do most handles get broken? Mostly by hitting the intended target with the handle instead of the metal head of the tool. In this case a family member was splitting wood with my wedge and sledgehammer and it was broken. Some tool stores will fix it for you but you will then buy the handle, at a premium, and then pay for the labor as well.
How is a wooden handle held into the tool head? By a simple wood or metal wedge.
The channel through the tool head is slightly different on the two ends. One side, the bottom opening, is a straight-sided channel or hole. The other side, the top in this case, is beveled. The bevel is so that the handle can be wedged outward to lock the handle in place. This is done by hammering a wood or metal wedge into the top of the handle and it expands out to fill the beveled space. In my case, the wedge used in the old handle was metal. To remove the old handle you have to remove the wedge.
 These two pictures show you what a metal wedge looks like. It is ridged so that it cannot back out of the handle as the tool is used. Wooden wedges are usually smooth and stay in place through wood on wood friction.
Because the metal wedge is ridged, it has to be freed from the surrounding wood. The best way I have found to do this is to drill several holes on both side of the wedge.
The metal wedges are generally soft metal but you still need to be very careful and precise when drilling these holes. The drill bit can get stuck and suddenly twist the drill in your hand or spin the tool head if you are using a drill press. I use a hand drill but a drill press might be more precise if you are not very experienced. Remove as much wood as you can drilling deep enough that you go below the bottom of the wedge.
Once I have drilled straight down I usually make a couple of passes at an angle to remove some of the wood between the holes.
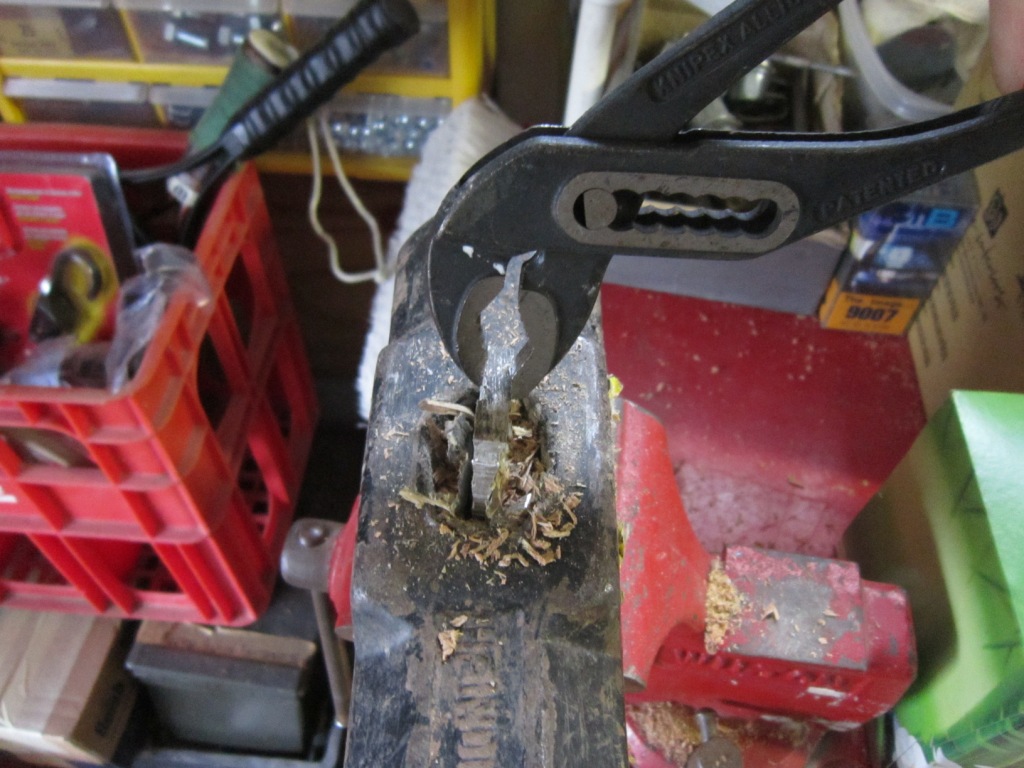
This is a little hard to see but once you remove as much wood as you can you need to pull out the wedge. I used an old screwdriver to loosen up the wedge and then grabbed it with pump pliers and wiggled it free.
With the wedge pulled out you can now push out the old handle. It will only go one way, down toward the handle side of the tool head. I usually use a blunt punch and a hammer to pound it out of the tool head. Sometimes it is rusted fast or swelled due to absorbtion of moisture and/or oil. But a couple good whacks with a hammer should punch it out. If not, get out your drill, place a larger bit in it, and completely drill through the full length of the wood.
Once the old handle is out it is time to insert the new handle. Make sure you insert the handle from the un-beveled side of the tool head. The beveled side should be facing up. Place the handle in the bottom of the tool head and then slam the handle straight down onto a hard surface. The weight of the tool head will cause it to drive down the handle as far as it can go. Once you hear a solid sound when you hit the handle on the ground or work bench top, it is as far on the handle as it is likely to go. If you keep driving the handle into the head it will start to splinter.
 As you can see, the handle sticks out the top of the tool head. This excess is because these handles fit more than one type of tool and some are wider. This excess must be removed before wedging the new handle. I use a metal cutting hack saw because a wood cutting saw will be damaged doing this.
 The handle has a slot cut into it. When you drive the handle into the tool head this crushes together to fit snuggly in the tool head. That slot is where the wedge will be driven. I am going to use the wooden wedge, I usually prefer wood wedges with new handles.
Place the wedge into the slot cut into the handle and carefully hammer it into the handle. Wooden wedges will easily split if you don't hit it square so be careful. Once it is solidly in as far as it will go stop hammering it or you will split the wedge. Cut off the excess so it is flush and then hammer it a few more times to slightly depress it into the handle. When it is cut flush it can't really split so this is safe to do.
You are now done. This is at most a 20-30 minute job and will save you up to $20. Buy spare handles for tools you have on hand when they are on sale or you see a good deal. They don't spoil or go bad. I have handles in my workshop that are over 30 years old and they are as good as new. (I inherited them when I bought the house.)