Wednesday, April 27, 2016

Cutting Timbers

This is another post that is not directly food related but is a Homesteading skill you might want to learn.

There is yet another blight going through my area killing off Blue Spruce trees. A few years ago I lost about twenty White Pines on the property. These were all trees planted as Christmas Trees by my wife's grandfather about sixty-seventy years ago. They were huge and a lot of work to cut down, de-limb, cut up and split for firewood, and burn all the branches. Now I am doing the same with seven, so far, huge spruce trees.

The trunks were fairly straight and 18-30 inches in diameter. I thought it would be a huge waste to cut these trees up for firewood. So I went online and ordered a Granberg Chainsaw Mill through Northern Tools. You can view the mill in action at: Mill

I was just experimenting today and used the worst of the logs I had. I didn't take pictures of the process, unfortunately.  The Mill took about thirty minutes to put together; the instructions were more than adequate. I didn't buy the Mill Rails that the company wants to sell you, I used a 2x6x10 that I had in my shed. I can see how the rails would make the job easier and the cuts straighter.  

I used four inch deck screws to secure the 2x6 on top of the log. I adjusted the depth of the cut to try to get the largest timber possible. As it turned out, I was able to produce a 6.5x9 inch timber. 

The saw I was using is an old Sears Craftsman 18" chainsaw that I recently repaired and got back into use. It is woefully under powered for milling but pine is soft and I had all the time I needed. It also does not have the recommended ripping chain and bar, I used the standard crosscut chain and bar. I did have trouble keeping the saw running, it kept stalling out, but otherwise it did a surprisingly good job.

Here is the result:


I have to say that the process is pretty easy if you are experienced using a chainsaw, take your time, and let the saw do the work. I have no intended use for this timber, I just wanted to try out the mill. 


I made the top and bottom cuts with the Mill but cut the sides free hand after scribing a line down each side. I am quite happy with the results and know that with more experience I will be able to turn out some good planks and timbers. 

The Mill is plenty fast enough to cut some planks and timbers for projects. With the correct saw, chain, bar and maybe putting the log up on a platform, you could produce quite a bit of almost free, usable wood. It took me about 30 minutes to cut this timber and it was my first attempt with an under-powered saw. I think I could cut the timbers for a cabin, shed, or other structure in a couple days if I had access to the trees. Slab planks would be even easier and quicker for flooring and siding.

This mill is obviously very portable so you could take it into the woods and cut your lumber and timbers on site. That makes the product a lot easier to carry out. The log I started with was a couple hundred pounds. This timber was about 125lbs, which I can easily carry. 

I used about a tank of gas to produce this timber; that's about a cup and a quarter of oil/gas mix. That is not too bad.

I cut up the four slabs cut off the outside of the timber for fire wood. I will run the bark through my chipper/mulcher for high quality mulch. So you really get to use every part of the tree trunk.

If you have access to trees, you can produce good quality lumber with this simple rig. There are fancier mills out there and they might do a better job. But the Granberg Mill is affordable; they are going for $159 at the time of this writing.

If you don't have your own woodlot, you can get trees for free from Craigslist and you can talk to utility companies and tree removal companies in your area. They usually have no interest in hauling out the trees if someone is willing to come and get them.

Saving Frost-Killed Plants

In a previous post I mentioned that my Cold Frame will protect cool season crops pretty well but other plants, not so much. I had two tomato plants and six pepper plants out in the cold frame to harden off and they were doing just fine for several weeks. Then temps dropped to 12 degrees at night. That wasn't what the weatherman predicted though so I left my plants out in the Cold Frame. All but one pepper plant were frost-killed. I left them out in the box though thinking I would have to buy new plants. The original plants were purchased down in Maryland, which weather wise is about 3-4 weeks ahead of where I live in Pennsylvania. No local nurseries were selling plants in my area yet. So I figured I would just wait a couple weeks and start over. 

So this is what the plants looked like a couple days after the severe frost. The plant was fatally burned by the 12 degree night time temperature. But as you can see there is still a tiny bit of green at the bottom of the stem even several days after the deadly night. In my experience, if you still have green, you can still save the plant (if you want to). So I removed some of the dirt from around the green nub so it would be exposed to sunlight. Green means it can absorb sunlight and convert it to energy. I also watered it well. Now, the only reason this plant survived at all is because I transplanted it from the six-pack container I bought it in, to a half gallon pot with the soil mix I talked about before (Sand, charcoal, and compost). This allowed the roots to grow quickly and for the plant to produce and store energy.


After a couple days a tiny sprout started growing from the green nub. This is evidence that the plant has enough energy to regrow. This is a very fragile growth though so these pots are going in and out of the garage with the replacement plants that I bought (see previous post). For the first couple of days I only put the plants out in diffused light, not in the direct sun light. I didn't want to sunburn the plants.


As you can see, this plant's sprout has now put out two leaves and will now quickly grow. The roots are good, the soil is good, and it is on its way to being a full plant in a couple weeks. So these plants will be behind the growth curve compared to the new plants that I started but they will still eventually produce peppers and tomatoes that I can process and can. It cost me nothing at all, except a little bit of time, to save a couple plants. 

So if you think you lost your plants to frost, give them a second chance and see if you can recover them. It saves you a bit of money and is satisfying.

1 July 2016 Update: The pepper plant did not recover but the tomato plant did. The tomato plant is now 20 inches tall with a couple flowers on it. I planted it in my dad's garden since he was in the hospital for the whole planting season. We will get some late season tomatoes from this salvaged plant. A 50% success rate is not too bad at all.


Sunday, April 24, 2016

Early Gardening 2016

I live in a place where, in Spring, it is very often down in the teens at night and up in the 40s or 50s during the day. Then the next week it is in the 80s. This makes it very hard to get plants started early; they are either freezing or over-heating. 

I have a small cold frame, I showed how I built it two years ago. It works fine for cool weather crops like lettuce, spinach, radishes, and carrots. I was curious how well it maintains the heat so I put a thermometer in it a couple weeks ago. On a morning when it was 17 degrees outside it was still 32 degrees in the cold frame. Still too cold for most plants but warm enough for others. 


Onions do quite well in a cold frame. I planted these in February. They will be big enough to eat in June. The upturned jugs are filled with water, which warms up during the day in the sunlight and then keeps the ground from freezing at night. I had other jugs of water in the cold frame to absorb excess heat from the sun-warmed box and then give off that heat at night.

I planted some radish seeds in February as well but starting seeds in cold ground is a hit or miss effort. It took three weeks for them to sprout and they really haven't been growing very fast. It is still quite cold at night. But now that the days are warming up I can take the glass off the cold frame during the day and they will start to grow faster soon. I should be eating my first fresh radishes in mid-May.


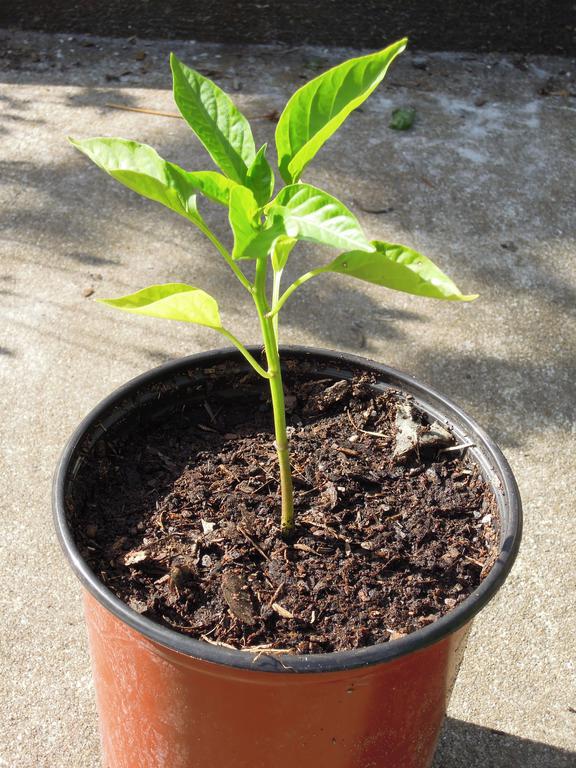
I bought a six pack of peppers for $1.48. These are small spindly plants coming out of green houses where they were grown under grow lights (usually). I usually buy these when I can find them early in the season or pre-season. Below is a six-pack of Tomatoes just to show the container and the small size of the plants, I forgot to take a picture of my plants when I bought them.


If you wait to buy the plants when they are larger, in quart or half-gallon pots, you will pay about $3.50 EACH! That is a huge difference. So I buy the six-packs and then transplant my peppers and tomatoes into half-gallon pots. I have a nearly endless supply of good compost and charcoal from my winter fires. I mix a batch of potting soil using sand, charcoal, and compost and put my little plants in bigger pots. The plants are already usually Root-Bound and the tiny amount of soil in the six-packs limits their ability to grow. But once you loosen the roots and transfer them to the bigger pots, they restart growing. I puts the pots in trays and take them out during the day and bring them into the garage in the evening so they don't freeze. Once all danger of frost has passed I will plant them in the garden. I do this pretty much every year and it saves me a lot of money.


This will give me a head start on the growing season and put food on the table when most people in my area are just getting their garden started. Oh, I almost forgot, I planted four short rows of green beans under plastic two weeks ago and a few of them have sprouted abut have no yet broken the surface of the soil. Next week I will post a note on how I start my beans in my early season garden.

Friday, April 22, 2016

Dandelion Foraging Season

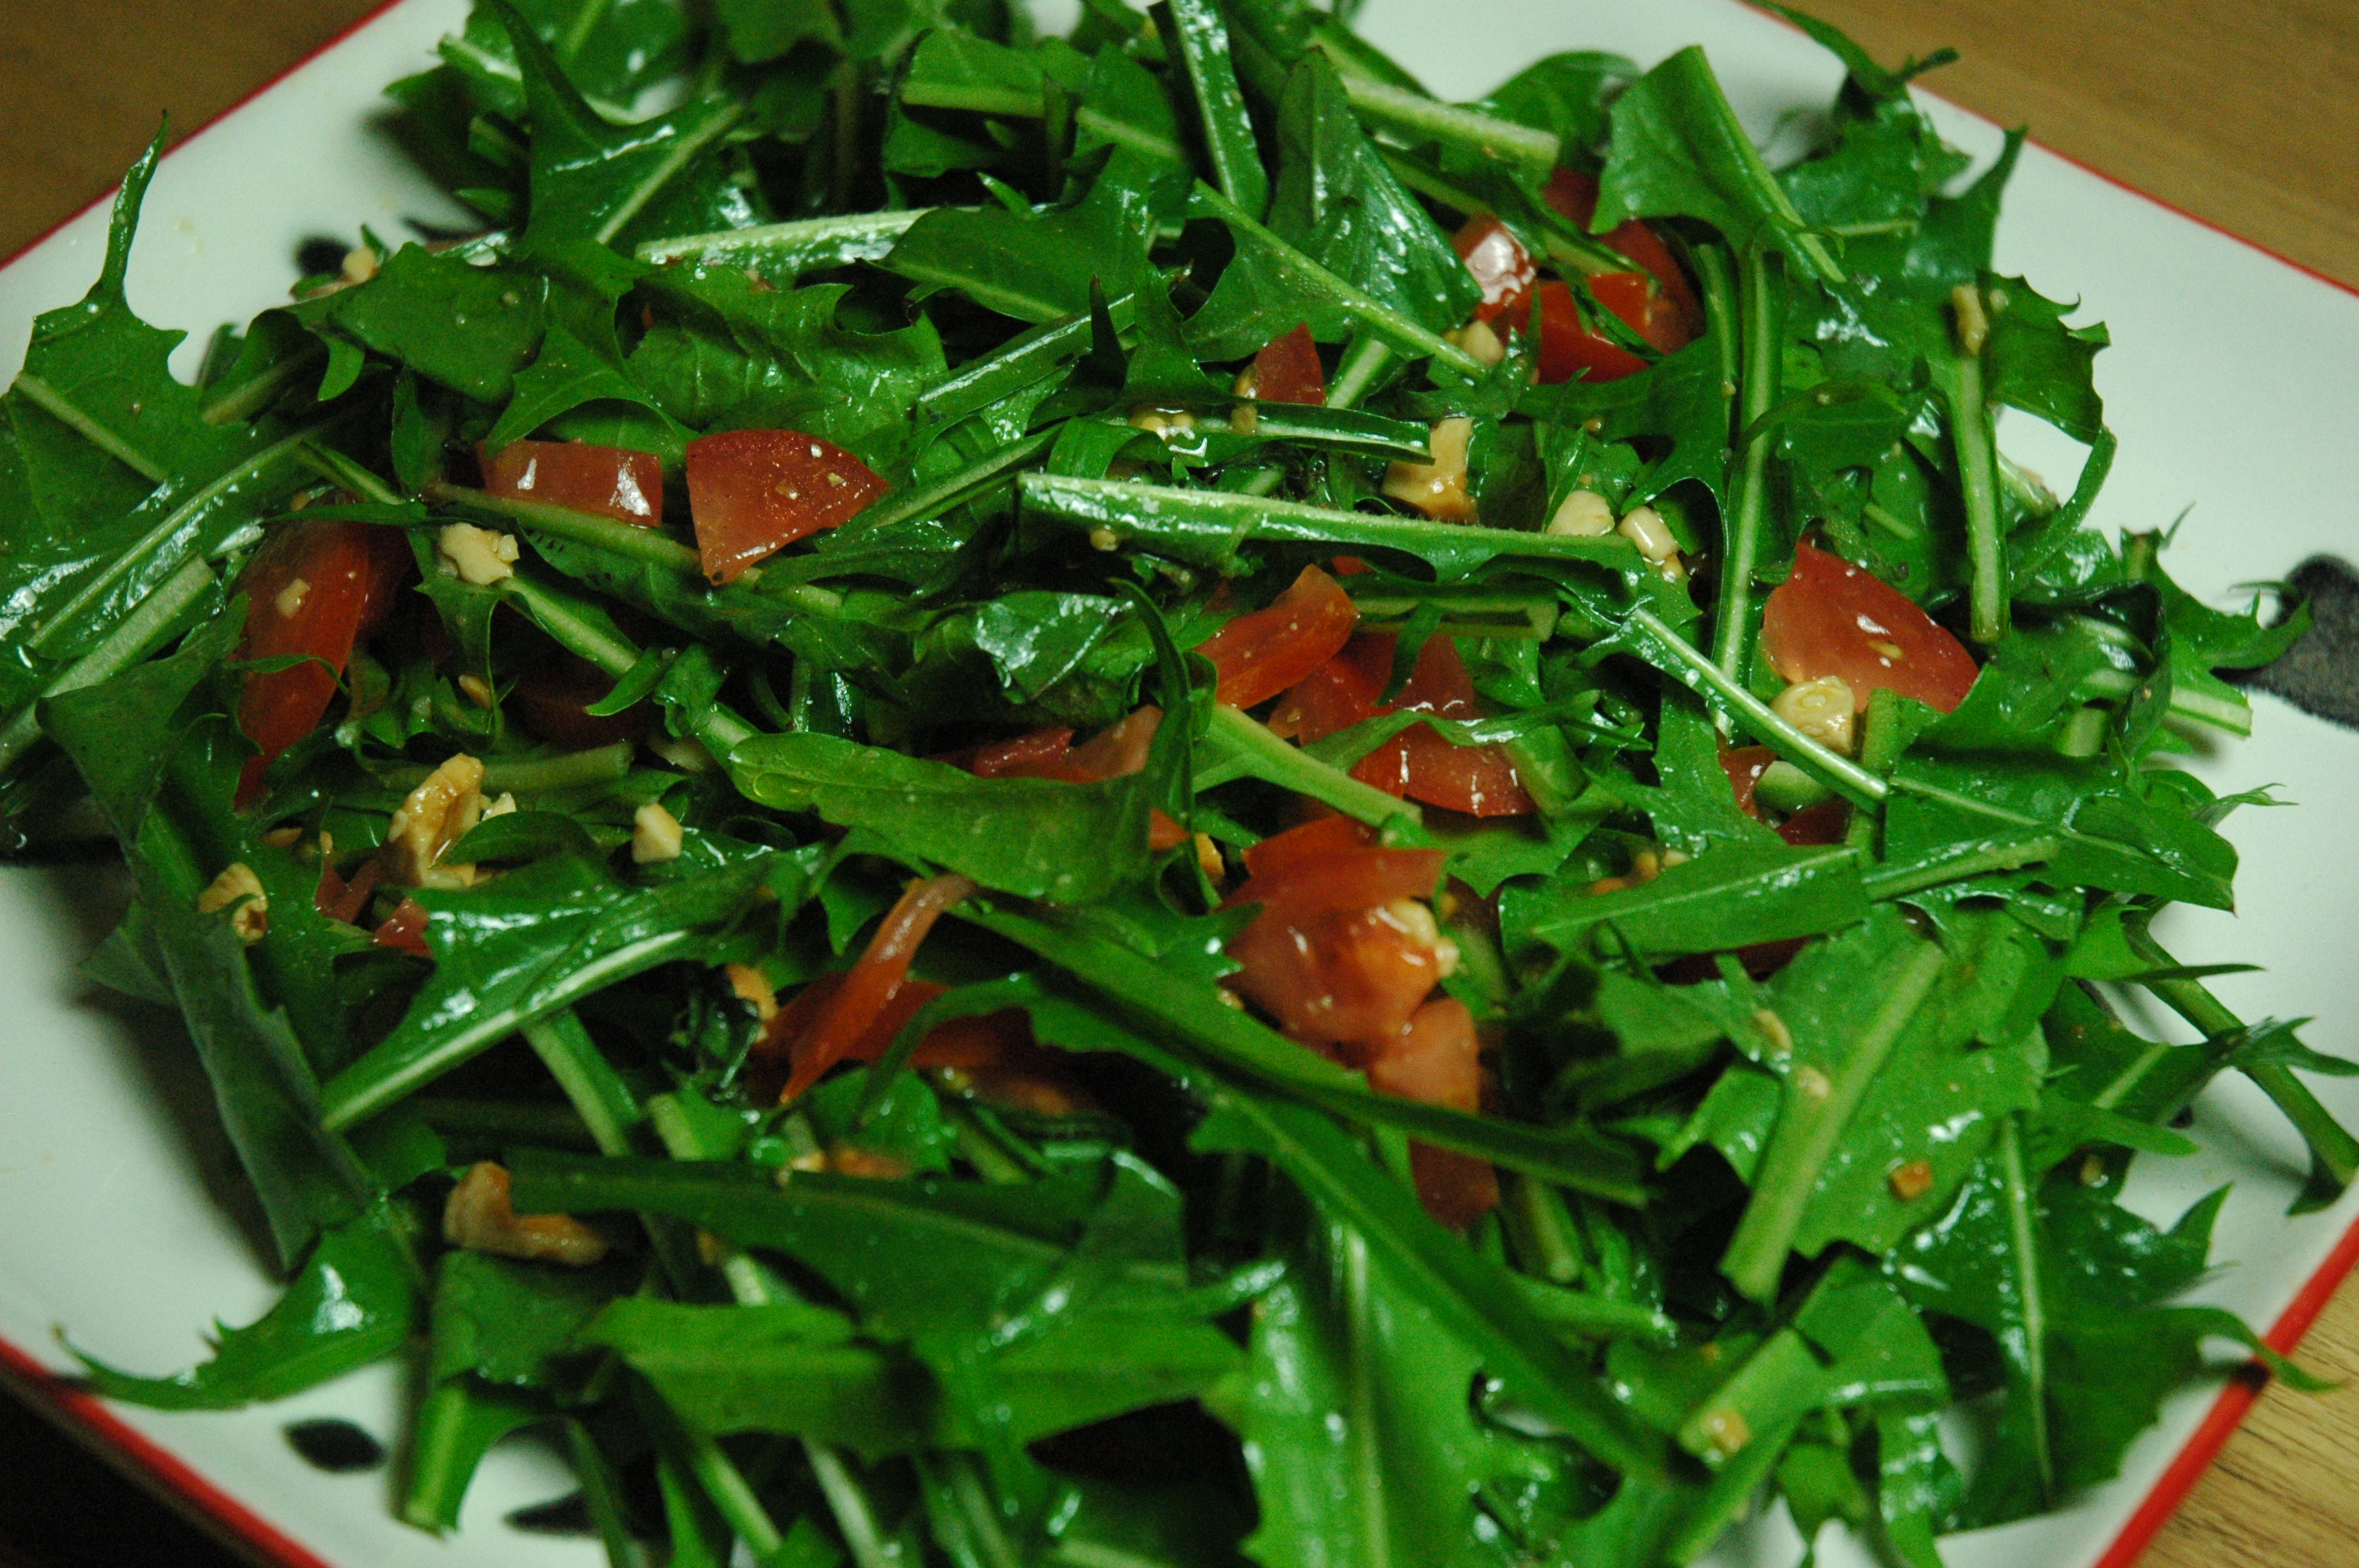
We are about a week or two into the Dandelion picking season. You can pick them all summer really but the earliest leaves are the least bitter. I added some to my supper salad tonight and enjoyed that.  The Pennsylvania Dutch were big, big fans of Dandelion salads. When I was much younger we used to forage across all the fields to pick garbage bags full of Dandelion leaves for the Church and Fire Company fund raising dinners. In this area, they make and use a Hot Bacon Dressing on their Dandelion salads. See a recipe for that below.

https://jeffreysaad.files.wordpress.com/2010/04/dandeloin-salad.jpeg

#1 – High in Calcium: Dandelion greens are loaded with calcium. Just one cup of chopped dandelion greens has 103 milligrams (10% of the recommended daily value) of calcium! That’s slightly more than kale! Add two to three cups of dandelion to a smoothie with calcium-rich fruits like orange, kiwi, fig or papaya and you’ll have a green smoothie that has more calcium than any dairy product!
#2 – Rich in Iron: Next to fresh parsley, dandelion greens have a high iron content. One cup contains 1.7 milligrams of iron.
#3 – Low Calories: Like all leafy greens, dandelions are low in calories. One cup of chopped dandelion greens has only 25 calories. While leafy greens are a low calorie food, I actually prefer to use dandelions because they have more calories than other greens. Since I try to get as many calories as I can into my morning smoothies, I add up to 4 cups of dandelion which adds 100 calories of nutrient-rich food!
#4 – Loaded With Antioxidants: Dandelion greens are high in vitamin A in the form of antioxidant carotenoid (beta-carotene) and vitamin C. Vitamin C also helps facilitate iron absorption.
#5 – The Ultimate Detox & Cleansing Green: If your goal is detoxification and cleansing, dandelion greens should be the ones you use in green smoothies! They are said to help cleanse the liver and many detox recipes call for them.
#6 – Lots Of Minerals: Dandelion greens are rich in minerals. Besides calcium and iron, they are a good source of copper (10% RDA), manganese (8% RDA), phosphorus (5% RDA), potassium (5% RDA) and magnesium (5% RDA).
#7 – 14% Protein: Dandelion greens have more protein per serving than spinach. The greens themselves are 14% protein and contain all essential amino acids so it’s a complete protein. One chopped cup contains 1.5 grams of protein.
#8 – Multivitamin Green: Besides vitamin A as beta-carotene (186% RDA) and vitamin C (21% RDA), each cup of chopped dandelion greens are also good sources of vitamins B1 (9% RDA), B2 (11% RDA) and B6 (11% RDA), vitamin E (13% RDA) and especially abundant in vitamin K (357% RDA).
#10 – Health Benefits of Dandelion Greens: The nutrients in dandelion greens may help reduce the risk of cancer, multiple sclerosis, cataracts, age-related macular degeneration and stroke. Dandelion contains anti-inflammatory properties which may provide benefit to those with asthma and other inflammatory diseases.

Hot Bacon Dressing for Salads

Makes about 1-1/2 cups
This Pennsylvania Dutch family recipe is a favorite sweet and sour dressing for green salads with dandelion, endive, or escarole. It works equally well with kale or romaine lettuce when the other greens are not available. It is also the dressing my family uses for our German potato salad recipe, which is in the similar and related recipes links.

Hot Bacon Dressing Recipe Recipe Photo(Pictured with Romaine Lettuce)
A salad with hot bacon dressing complements many meals, but we usually serve it with chicken pot pie, green beans and ham, baked ham or even with turkey for Thanksgiving. It makes a quick, easy and delicious side dish.

Ingredients

  • 1 large egg, well beaten
  • 1/3 cup granulated sugar
  • 1/4 cup apple cider vinegar
  • 3/4 cup water
  • 1/2 teaspoon salt
  • 4 strips bacon, cut into 1-inch pieces
  • 1 tablespoon all purpose flour
Beat the sugar into the egg. Add the vinegar, water and salt; beat well. Meanwhile, brown the bacon in a small saucepan. Stir in the flour and stir until smooth.
Add the liquid to the bacon mixture and cook over medium heat until thickened, stirring constantly. Pour hot dressing over coarsely chopped greens and mix thoroughly until wilted. Serve immediately.
Notes: The dressing can be prepared ahead and reheated, stirring constantly to keep from sticking to saucepan. If it gets too thick, add a little water. Depending on how many greens you use, you might have leftover dressing. It can be refrigerated and reheated before pouring on fresh greens.

Home Raspberry Patch April 2016

Where I live in Pennsylvania it is still about a month too early to do any serious gardening but there are tasks that can be done to get ready for the start of the gardening season. By using some season-extending techniques I have been able to get a jump start on a few things.

Each spring, usually in late March, I thin out my Raspberry patch and inspect it for damage, pests, weeds, and state of the soil. My patch is four feet wide and twenty-four feet long and is a raised bed made from 3x4 landscaping timbers. Those are the cheap, partially rounded ones you can get for between $3 and $4 at any lumber store. I put this bed together in 2001 and transplanted some Red Raspberry roots from my dad's patch. I bought the timbers from Walmart at the end of the summer season that year for $1 a piece and five dollars to haul away all the mulch they had in their display (three truck loads). Anyway, I have been tending this same patch of Raspberries for 15 years now and never had any problems with disease, pests, or fertility. 

So today I thinned out the old, dead canes. Most Raspberries fruit on one year old canes and during the winter after they fruit they die. Then the new canes from the summer will grow, leaf out, and fruit the following summer. If you don't thin them out, and most people don't, the patch gets over-crowded with dead canes. This increases the chances of disease and pests because they will survive the winter in the old, rotting canes. The other bad thing is that they block sunlight from reaching the growing canes. Raspberry canes leaf along the entire length of the cane so they need light to each everywhere. Below is the before and after pictures of the process:
This was the Raspberry patch at the beginning. Because I thin it every year it doesn't look too crowded but about half of those canes are dead and need to be removed. I also will weed the patch and reroute the canes on the left side behind the wires I use to keep the canes out of the grass path on the left side of the bed.

This is the same patch after thinning. You can see five piles of dead canes, I'll run them through the mulcher and use them to mulch around tomato and pepper plants. The rough shredded canes are almost impossible for slugs and snails to travel over. If you click on the picture you will be able to see how much more open the patch is now.

Last year was not a great year for Raspberries, the winter was very severe. This year should be better though if nothing changes. I mulched the bed very heavy in the fall with shredded grass and leaves to protect the roots from the cold winters we have been having. It seems to have worked pretty good. Because the mulch is so heavy the soil is still moist even though it hasn't rained here in quite some time and the Township instituted a "Burn Ban" because everything is so dry. 

Now there is nothing that really needs to be done except to check the patch once a week and watch for weeds and insect pests. The only problem insects I have ever had here are Japanese Beetles. They don't harm the fruit but they will eat all the leaves. I have found that wetting the patch and then dusting the plants with plain powered lime is enough to stop them. 

My patch comes to fruition right around the Fourth of July plus or minus a week. From this patch I'll get about four or five gallons of berries over a three week period. None a single one goes to waste, we love them.